


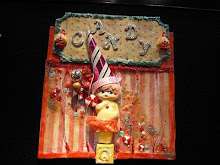
 Caldwell College book signing


Materials:
-Wax paper
-Printer paper
-Ink jet printer
-Image or lettering of choice
-Bone folder or painting scrapper
-Muslin fabric craft tote
-Pillow stuffing
-Paper spray adhesive of choice
-Tools: scissors, sewing needle, sewing thread, heat tool


Directions:
Iron on Paper Transfers:

- Choose a few images or lettering labels you want to print. (visit my flickr gallery for a bunch of free collage images)
- Cut a few pieces of wax paper to 8.5 x 11 inch sheets. Attach the cut wax paper to the same size computer paper using spray adhesive. Load into your computer printer. Make sure the wax paper part is the area that gets printed on when it comes out of the printer. (Doing this makes printing the wax paper easier)
- Before you begin printing, make sure you switch your printer settings to mirror images, so that the wording or images print in reverse.
- Carefully remove the printed sheets from the printer, making sure to hold the ends, away from the ink, as the ink stays very wet.
- Place the wet side of the wax paper onto one side of the muslin fabric craft tote, then using a bone folder or painting scraper, press/rub down onto the paper until the ink has transferred to the fabric.
- Remove the paper and using a heat tool or blow dryer, add some heat to set.
Cut the tote straps, fill with pillow stuffing and stitch close.

- Replace the wax paper and printer paper with iron on transfer paper and print. (remember to click on the mirror settings on the computer before printing)
- Then iron onto the fabric, stuff, stitch.
- Print your image on regular printer paper. No need to mirror image.
- Place a piece of transfer paper onto the fabric and layer the printed image onto it, with printed side facing you (Blank side down against the transfer paper).
- Trace the image onto the fabric using a stylus or pencil. Remove both papers.
- Fill in the transfer with a black paint pen or sharpie.


- Buy paint stencil online or at craft store.
- Using a stencil brush and black fabric paint, stencil on the fabric.
Tips/Tricks:
-Try color images
-Photocopy ticket stubs such as a first movie date, wedding table number, broadway or sport tickets for a fun memory pillow.
-Create fabric banners, or print on wood.
Hope you enjoyed the tutorial, so many possibilities, Love to see what you make. I have my pillows on the couch and sitting chairs. I've even used them to showcase my jewelry wares. Now onto the next crafting adventure.
xoxo
Lisa


No comments:
Post a Comment